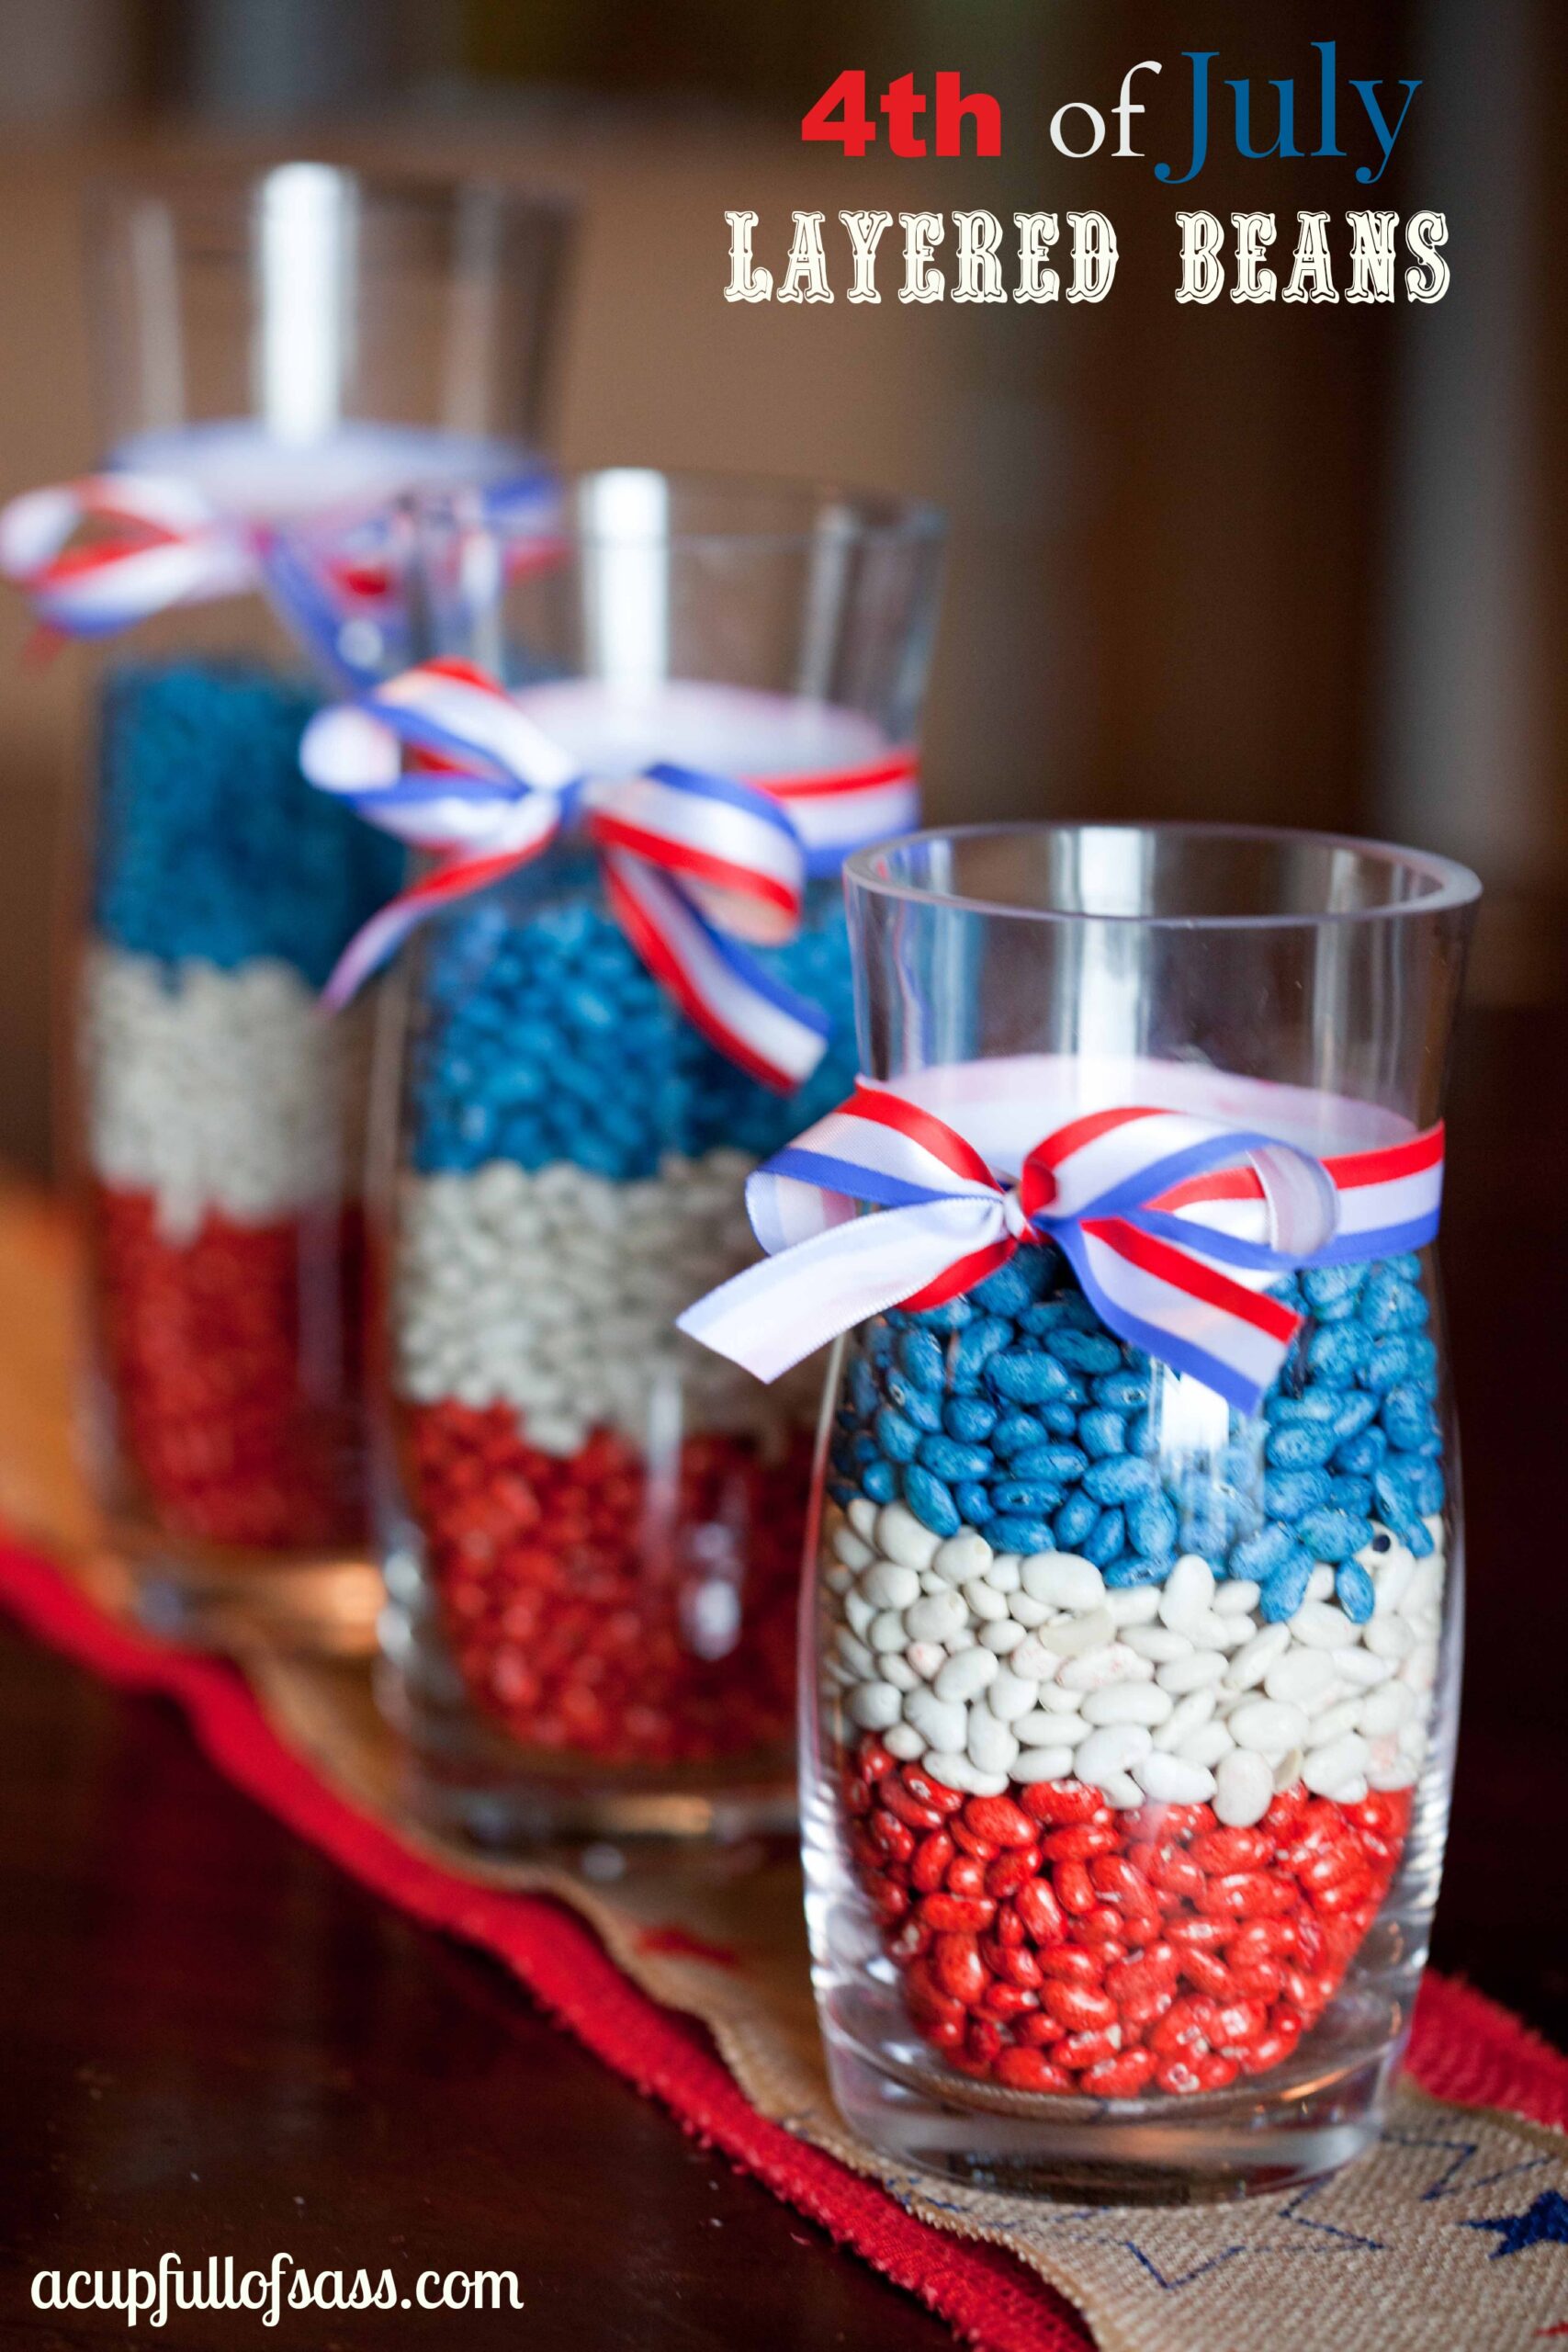
I decided to make Fourth of July Layered beans to go on my dinning room table. I love how they turned out! And that I can use them for years to come. I learned a trick or two along the way when making this. I wanted to share it with you just in case you wanted to make this fun decor for your home. Here we go.


Supplies:
- 3 bags of Great Northern white beans (2lbs each)
- Icing color gel – Red-Red and Royal Blue (I used Wilton brand)
- Cookie sheet
- Wax paper
- Gallon Ziploc bags (I suggest the slider Ziploc bags)

Before I give the directions let me tell you what I did. I started out by using the liquid bottles of food coloring dye. I used the blue dye first. After using almost all of the liquid blue dye, the color wasn’t the blue I was looking for. Since I had a jar of the blue icing gel by Wilton, I added that and wow, what a difference! Much better.
Next it was time to do the red. When I used the red liquid dye I was not getting the color of red I was hoping for. I used the entire bottle and the beans were more like pinkish red to me. Not the color for the Fourth of July. So because I did not have any gel icing color on hand my darling husband went to the store to pick me up a jar. I then added red gel to the beans and again I was so much happier with the color. My advice is to skip the liquid food coloring altogether. Just use the gel food coloring my Wilton.
Also, after I air dried the beans for several hours, they still were not dried completely. They also had a stickiness to them. This could be because I used like an entire bottle of liquid dye then used gel. I don’t know for sure. So I decided to bake the beans in the oven on a low setting for 10-12 minutes to help them dry and maybe even set the color in better. So just know that baking them is optional, but it worked for me.
Directions:
- Pour one bag of beans into the Ziploc bag.
- Add the Wilton gel icing color to the beans. Start with a small amount and you can always add more until you reach your desired color.
- Mix the beans with the gel food coloring inside a ziplock bag by rolling the beans around. Mix well.
- Once mix throughly and the color is to your liking, pour beans onto a cookie sheet covered with wax paper.
- Let air dry for 2-3 hours.
- Bake in oven at 200 degrees for 10-12 minutes (this helped mine dry.) This is optional.
- Once the beans are completely dry, layer the beans into a jar of your choice. I went with the Red first, White next and Blue last.

There you have it. This was so much fun to make and I absolutely love how it turned out! I plan on doing this same project for other holidays, but with different colors. Like Halloween, Valentines day and even Christmas. I hope you enjoyed this DIY as much as I did!

xoxo,

Facebook | Pinterest | Twitter| Instagram| Periscope

I LOVE this idea!! So cute!!
Thank you!! It was easy to do and really made a great center piece for my dining room table. 🙂
I just made these tonight and used the gel icing alone and couldn’t achieve a nice bright color but with some regular food coloring added I got nice bright colors so I’m thinking it may be needed to use both to get the brilliant colors!
Oh good! I am so glad you had both. Thanks for letting me know. That helps a lot! I’d love to see how they turned out. 🙂